How to Troubleshoot Screen Sharing Issues
This article explains how to troubleshoot common screen-sharing problems that may occur during the equipment check process of a proctored exam.
By following the recommendations in this guide, you can resolve screen-sharing issues and ensure a smooth online testing experience.
Common Reasons for Screen Sharing Issues
If you encounter issues sharing your screen, consider the following possible causes:
- Partial Screen Sharing: You may be sharing only a specific window, rather than your entire screen.
- Multiple Monitors: Using multiple displays without duplicating can cause screen-sharing failures.
- Screen Recording Disabled (macOS): On Mac computers, the browser may lack permission to record the screen.
Important Preparation Before Starting the Exam
- Duplicate Multiple Displays: If you use more than one monitor, duplicate (mirror) your displays so all screens show the same content. This prevents sharing errors.
- Disable macOS Overlay: Mac users should disable any screen overlay apps or features that may interfere with screen capture.
- Allow Chrome Window Management Permissions: Chrome users must ensure the Window Management permission is enabled in site settings to allow full-screen sharing capabilities.
Enabling Window Management Permission on Chrome
To ensure that the Window Management permission is enabled, follow the steps below:
- Click the Google Permissions settings button
- Select Site Settings.
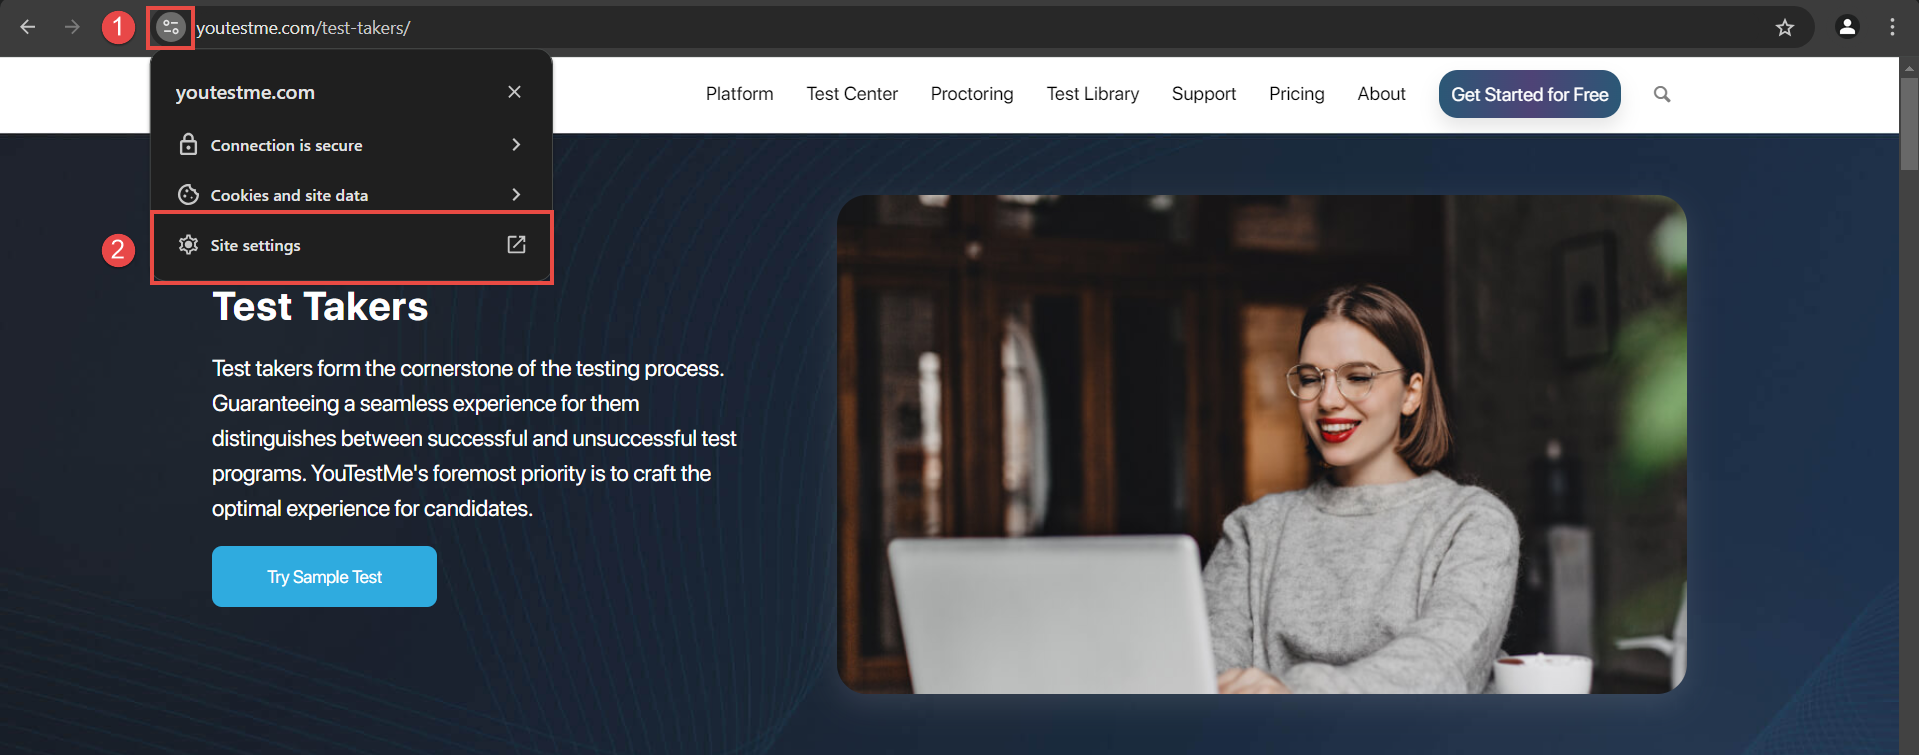
- Under Permissions, click Additional permissions. Scroll down to find the Window Management permission, and from the dropdown menu, select Allow.

Allowing Screen recording permission on macOS
When using a macOS device, make sure the browser has permission to record the screen. You can enable screen recording by following the Mac-specific instructions for screen sharing.
Sharing the Screen during the Equipment check
During the first step of the Equipment check, the system will prompt you to choose what to share. Please ensure that you select the “Entire Screen” option.
Google Chrome
- Choose the Entire screen tab.
- Click the image of your screen.
- Click on the Share button.
Note: If you are using multiple displays, ensure that you duplicate them or disconnect the extra monitors.
Mozilla Firefox
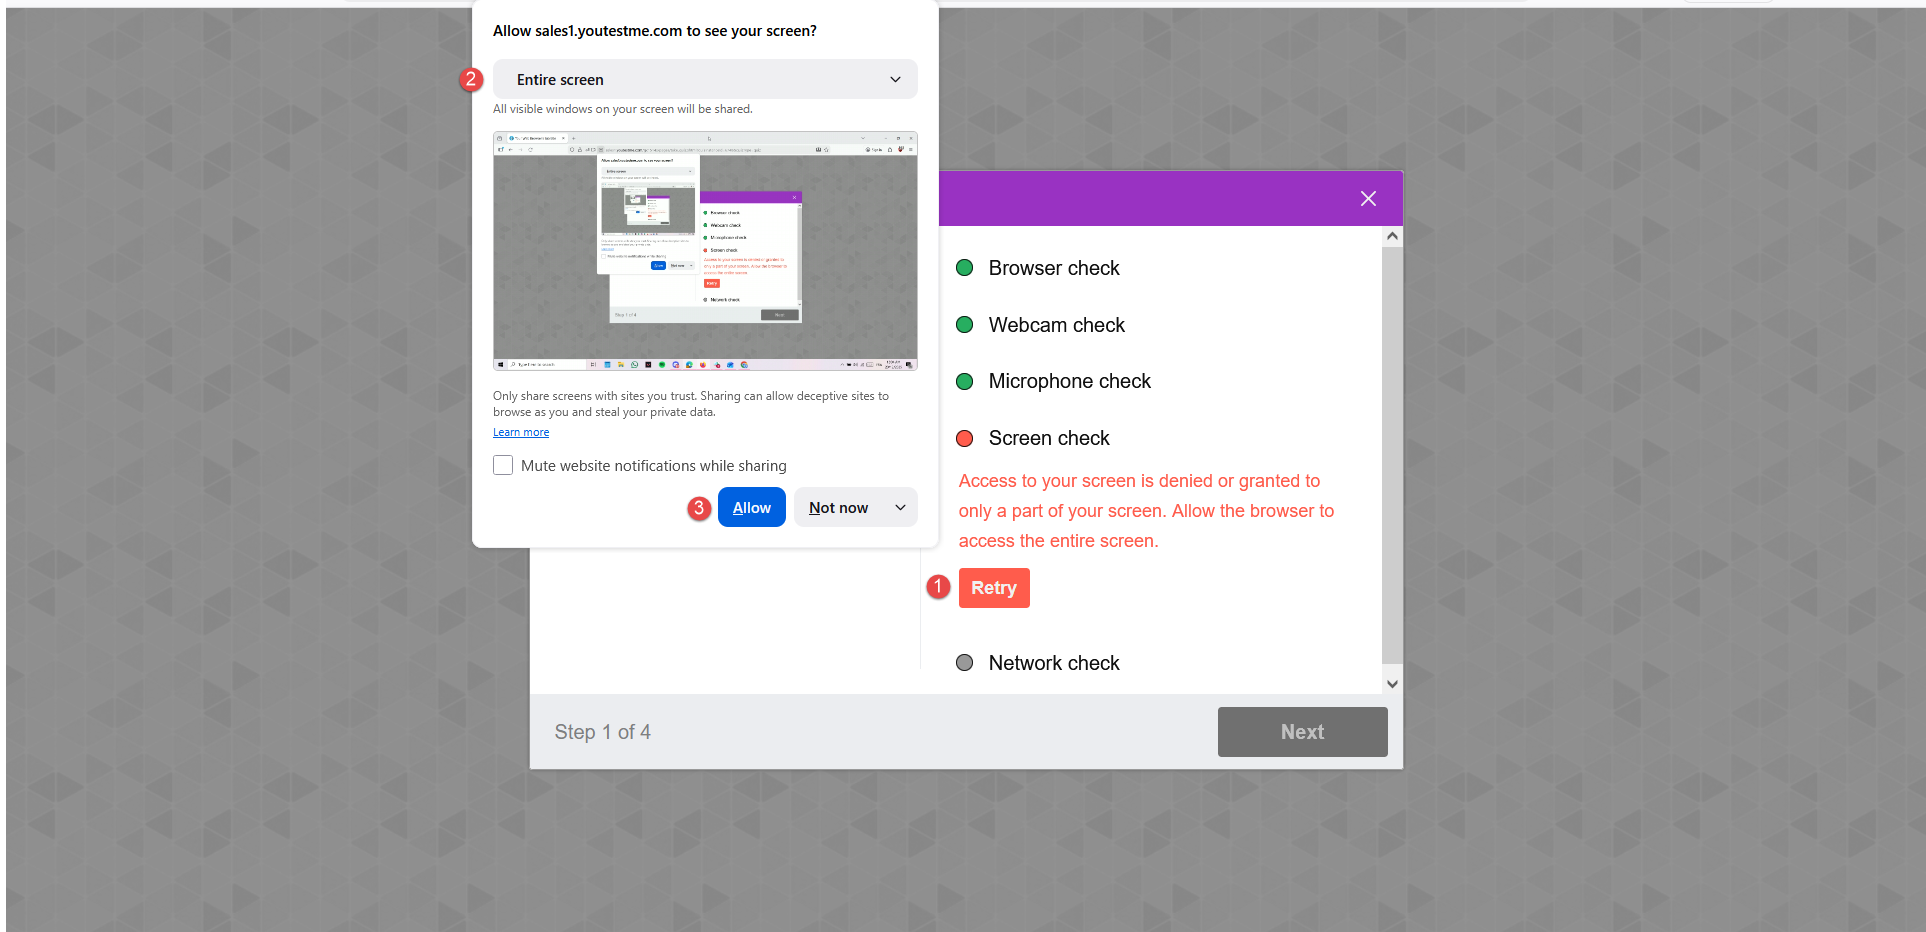
- Click the Retry button during the system check, and a screen sharing permission window will appear next to the URL.
- Choose the Entire screen option from the Select Window or Screen drop-down.
- Click on the Allow button to permit screen sharing.
Note: If you are using multiple displays, ensure that you duplicate them or disconnect the extra monitors.
Additionally, try the following:
- Click the Padlock icon to the left of the URL in the address bar.
- Select Connection secure → More information → Permissions.
- Find the Share the screen option.
- Uncheck Use default, and then manually select Allow or Always ask (make sure the Block option is not selected).
Unlike Chrome, Firefox does not require system-level permissions such as Windows management access, but it does require browser-level permissions to be granted each time.
Resharing Your Screen During the Exam
If screen sharing stops during your exam due to reasons such as an unstable internet connection or accidental interruption, follow these steps to resume sharing your screen:
- Notification to Reshare: If screen sharing is interrupted, a notification will appear next to your video thumbnail, prompting you to restart screen sharing. Click the notification to open the screen-sharing dialog for your browser.
- Select Entire Screen: Ensure you select the Entire Screen option in the dialog.
- Choose the Screen: Click the screen picture to activate the “Share” button.
- Complete the process by clicking the “Share” button.
Related Articles
How to Troubleshoot Camera Issues During a Test
This article explains how to troubleshoot common camera issues that may occur during the equipment check or while taking a proctored exam. It covers the most frequent causes of webcam failures and provides step-by-step guidance to help candidates ...How to Troubleshoot WebRTC Issues
Possible Causes of WebRTC Issues Network Configuration Blocked Ports: The necessary ports (3478/tcp, 3478/udp, 49152-65535/udp) may be blocked by your network’s firewall or router. Strict NAT Settings: Network Address Translation (NAT) configurations ...How to Enable Screen Sharing for the Proctored Test on MAC
This article illustrates the steps to grant screen recording permissions to a specific browser on your Mac. Enabling Screen Recording Permissions To enable screen recording, you should 1. Open the Apple menu. 2. Choose System Preferences. Select ...How to Troubleshoot Face Capturing Issues During a Test
This article explains how to resolve issues related to face capturing during the equipment check process. Recommendations If you are unable to complete the face-capturing step, follow the recommendations below: 1. Allow access to your camera When ...How to Troubleshoot Microphone Issues During a Test
This article offers guidance for addressing microphone issues that may arise during proctored tests, particularly when the microphone is not detected during the equipment check. For Google Chrome 1. Click the three dots icon in the top right corner ...